
Endor Base member Shrey walks us through how she created her Wicket mask and hood/headdress. These techniques can also be applied to other Ewoks. Some of the techniques included in this walkthrough are sculpting, soft foam building, and working with faux fur. The full original build thread can also be found on Shrey’s Ewok (Wicket) Build Thread on the Rebel Legion Forum.
Additional parts to this series:
- Ewok Build Part 1: Creating the Ewok Head
- Ewok Build Part 2: Creating the Ewok Hands and Feet
- Ewok Build Part 3: Creating the Ewok Body Structure
- Ewok Build Part 4: Creating the Ewok Fur Suit
- Ewok Build Part 5: Creating the Ewok Prop Weapon
Please always remember to use appropriate Personal Protective Equipment (PPE), such as gloves, masks or respirators, and safety glasses.
Click the images for larger versions.
Building the Face/Head
Having completed (as much as any costume is ever completed) a Wicket build, and as there don’t seem to be a lot of Ewok build threads, I thought I’d put together something that might assist any aspiring Ewoks. Many thanks to Erin and Chirpa’s Ewok Army on Facebook for all the tips that got me on my way!
I began with the most complex part, the face. I created the face out of a street hockey helmet with the chin strap and face grid removed, a foam camping mat and some foam I had from some refrigerated shipments. My art history textbooks finally came in handy to flatten the camping mat.
-
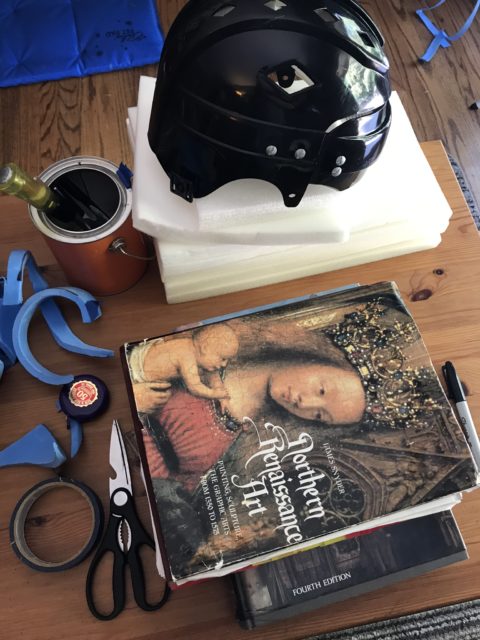
- Ewok Build Materials
I sketched out the general concept of the face on the camping mat, then cut out the center of the mouth (for ventilation) and the eyes, inserting 1/2 plastic Christmas ornament orbs into the eyes.
-
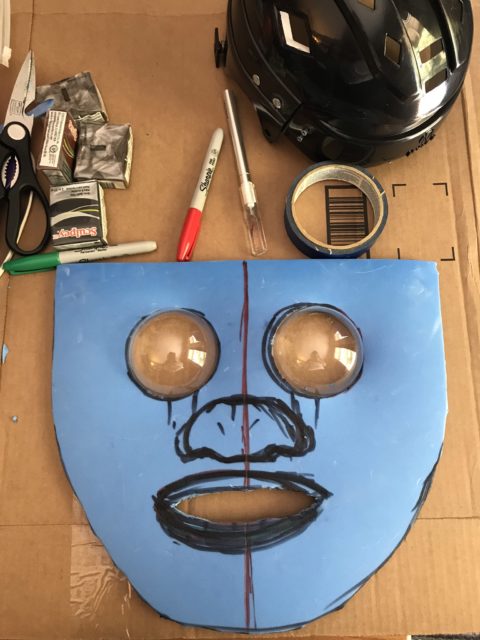
- Beginnings of Ewok Face with Christmas ornaments for eyes
I colored two layers of cheesecloth with black, brown and orange fabric marker and glued it behind the eyes, and affixed the face to the mask with heavy-duty sticky Velcro so I could make adjustments for vision. I later padded out the front a bit so the face laid more flat on the helmet. I also colored cheesecloth in with black fabric marker for behind the mouth, for additional airflow.
-
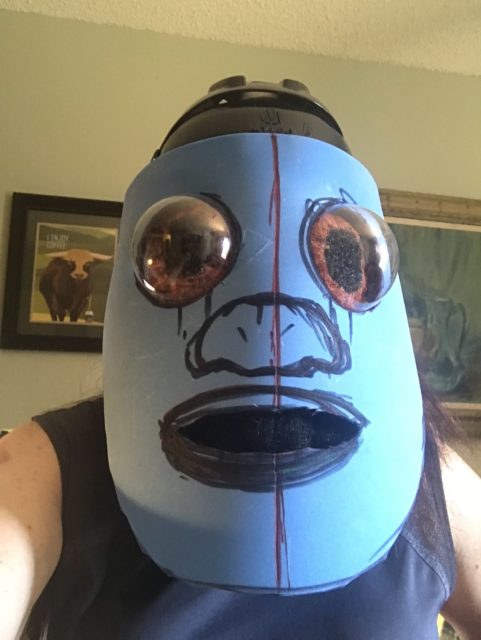
- Ewok mask with eyes in place
Using aluminum foil, I made a framework for the nose and mouth.
-
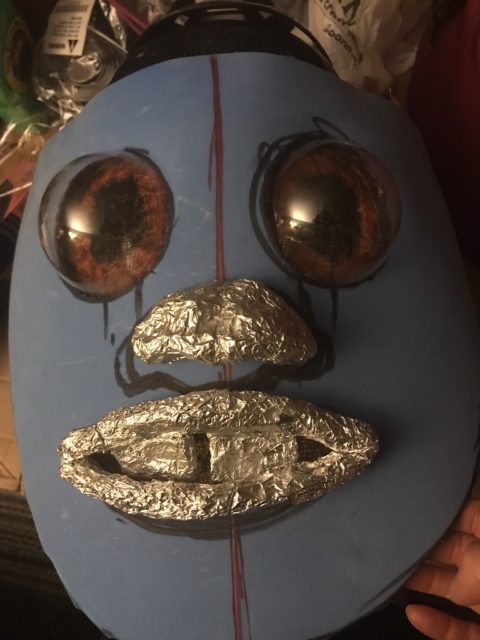
- Ewok face mask with foil structure for nose and mouth
I covered the aluminum foil with Sculpey and baked it according to the directions.
-
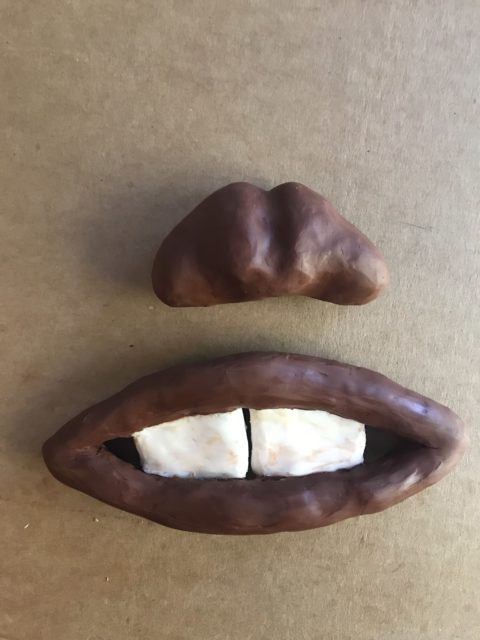
- Baked clay parts over foil base
I glued the mouth and nose onto the camping mat with hot glue.
-

- Ewok mask with nose and mouth attached
I ordered swatches of various faux furs to see them in person. A couple were wildly diverging from how they looked on a screen. I ultimately chose Maine Coon in brown/camel with 3-4″ pile for the main body and Fox in dark palomino with 3 5/8″ pile from Mendel’s; long pile really helps hide seams and a multitude of sewing sins.
-
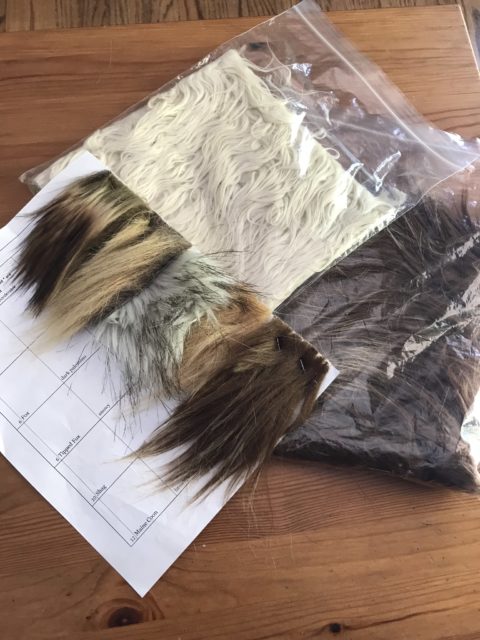
- Faux fur swatches
Having selected the fur, I cut and trimmed the foam to create a brow, nose ridge, cheeks and a chin. I hot glued the foam to the camping mat (and also glued myself a few times, which I would not recommend). Ewoks have a rather babyish, flat face, but they do have some dimension. I later moved everything up and took down some of the foam on the top of the head, but this gives the idea. The ears were created with camping mat, faux suede, and the faux fur. I also painted the nose and mouth with some black, brown and tan acrylic and sealed it with a Liquitex varnish to give them some depth.
-
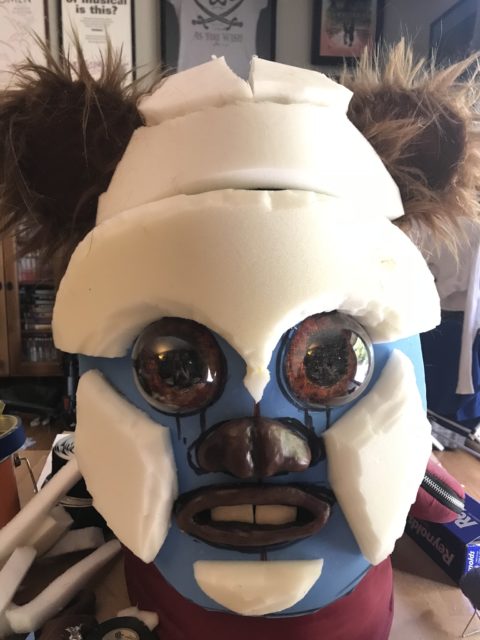
- Ewok head with foam attached for structure
Once satisfied with the structure of the face, I began hot gluing faux fur on in the direction fur would grow. You can pin the fur on to see how it looks before gluing since it’s all going to be covered anyway.
-

- Ewok Mask with foam structure and beginnings of fur placement
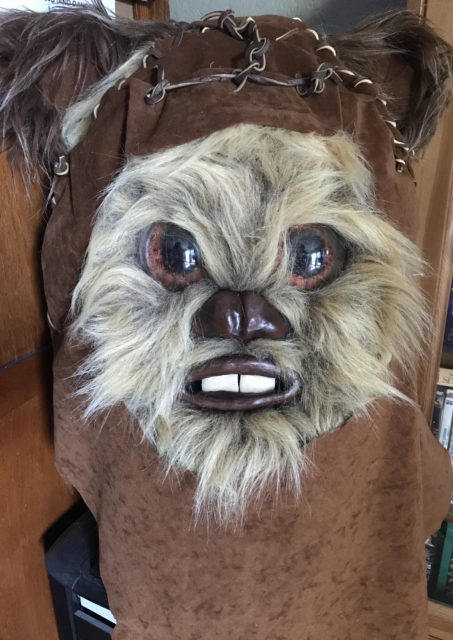
Here’s the face with the forehead reduction and full fur coverage, and after reducing the forehead even more to give a rounder-shaped face:
-

- Ewok Mask with full fur and forehead reduction
-

- Ewok face with further reduction
Making the Hood/Headdress
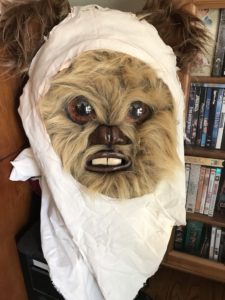
Satisfied with the head, I began work on the hood. I mocked it up with muslin.
-
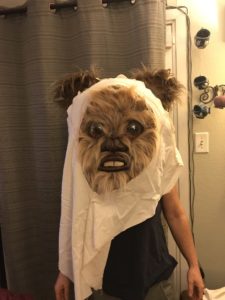
- Ewok Mask with hood mockup
-
- Ewok Mask with adjusted hood mockup
Using the muslin template, the hood is made of faux suede, sewn together with a canvas needle and heavy-duty thread. Once sewn, I sprayed it with a brown spray paint meant for floral arrangements for weathering along the side seams and the bottom edges. I then used a leather punch to create holes for the leather cording, which I fed through and tied.
-
- Ewok hood with lacing
I later made some adjustments by tacking the hood to the foam at the ears and the fold-over detail at the front, to keep it from moving around, and tightened it to frame the face more closely.
-

- Ewok hood with adjustments
-

- Ewok mask with adjustments (side view)
Creating the Mask Interior
I installed a fan system on the inside of the face. There are three small fans, one next to the mouth opening, blowing air up, and one each for the eyes to keep them from fogging up. The large blower in the back keeps air circulating. The blue thing is a rechargeable battery that is velcroed on. The assembly isn’t visible under the hood. See dbickel’s commentary on “Light and Airy Ewok Tips” thread in the forums for info on how to get the fan setup.
-
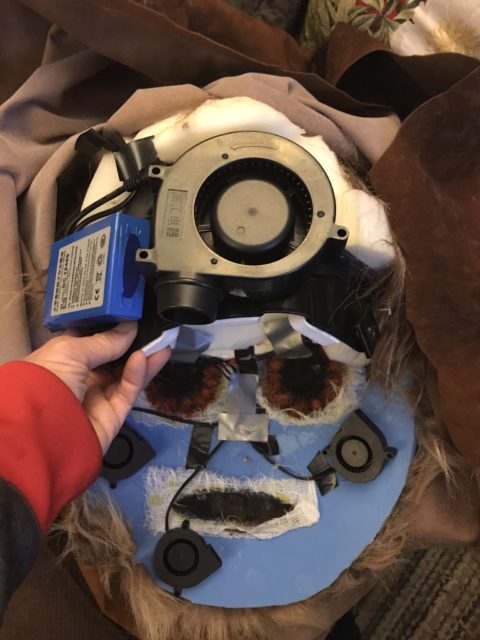
- View of Ewok head fan setup
My head is pretty small, so I had to pad out the interior of the helmet to keep it from slipping around when I moved. The eyes are wider set than my eyes and the whole thing sits in front of my face. Peripheral vision is a no, but vision is good enough to get around.
-
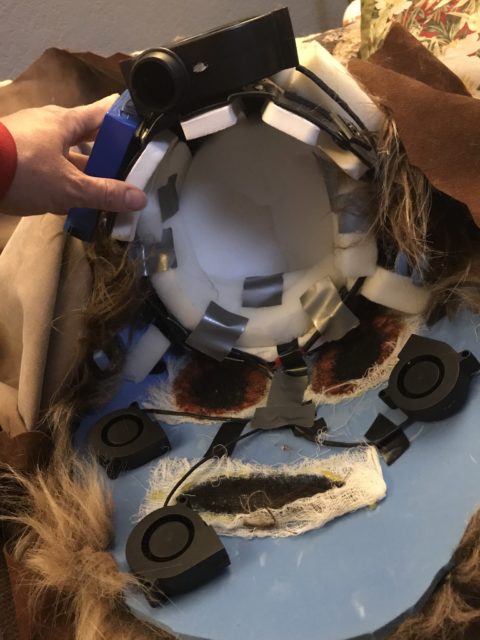
- Ewok Head inside view with additional padding
This concludes the creation of the Ewok head and hood. Want more? Continue onto Ewok Build Part 2: Creating the Ewok Hands and Feet.