
Endor Base member Shrey walks us through how she prepared and painted 3D printed armor for her Cara Dune build. These techniques can be applied to nearly any build using 3D prints or in need of a chipped paint effect.
Please always remember to use appropriate Personal Protective Equipment (PPE), such as gloves, masks or respirators, and safety glasses.
Click the images for larger versions.
Preparing and painting 3D printed armor with a chipped paint effect
I am currently working on a Cara Dune build, and thought I would write up how I prepared the 3D printed armor for painting, and then created a chipped paint effect.
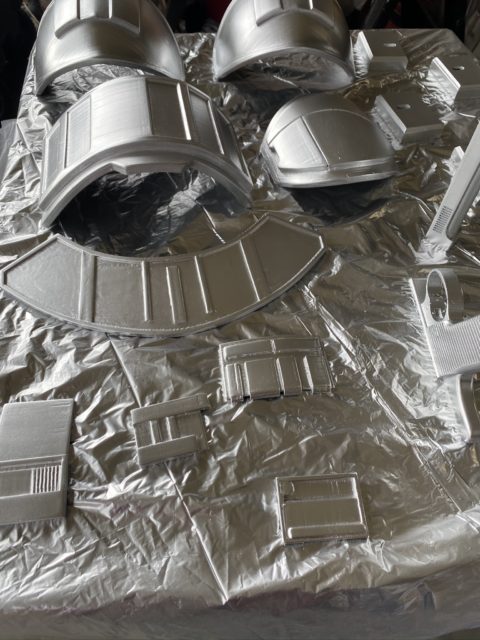
First, I sanded the rough prints, then rinsed them and let them dry.
-
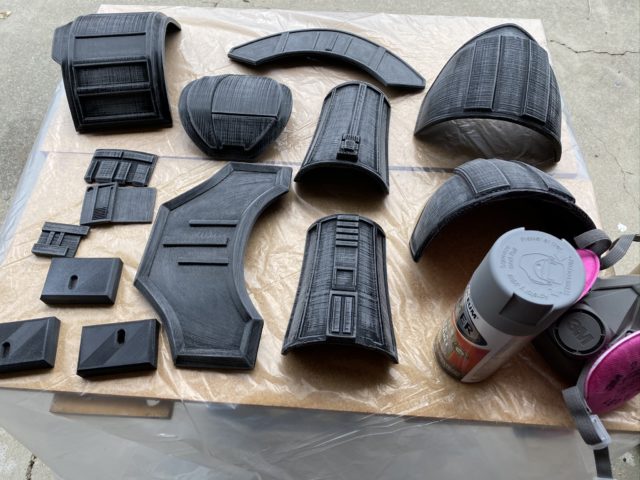
- Raw, sanded 3D printed armor, sandable filler primer and PPE
I then sprayed all the pieces with multiple layers of sandable filler primer:
-
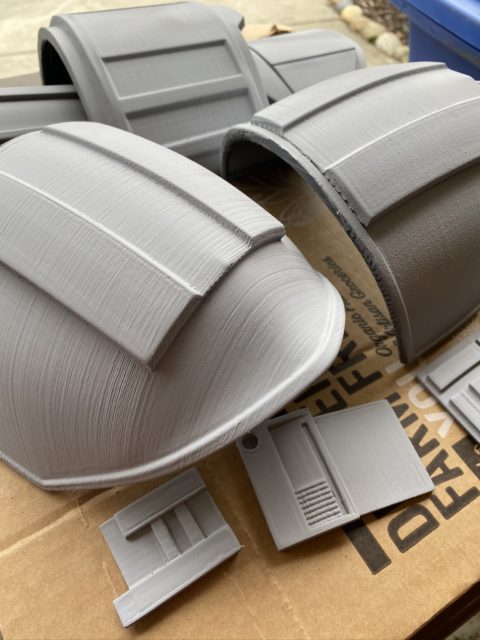
- 3D printed armor and greeblies after several applications of filler primer
After letting the filler primer dry, it was back to more and more sanding, using increasingly finer sandpaper. For larger imperfections the filler was unable to help with, I used Bondo sandable glazing putty, which also is sanded after it dries:
-
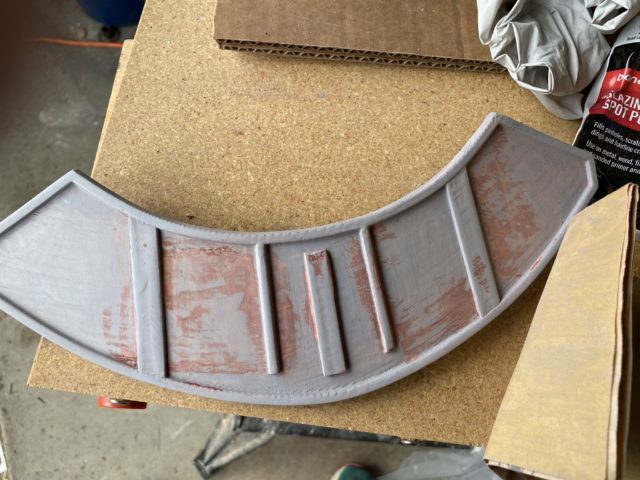
- Sanded Bondo glazing putty on primed 3D printed armor
Cara’s armor is somewhat battered, so did not have to be entirely smooth. If you want very smooth armor, you may need to take additional steps. But for my purposes, this was good enough, and it was on to the spray paint.
Here are the products I used:
-

- Rustoleum silver metallic and ultra matte deep teal
Cara Dune’s armor appears to have once been silver, with a teal color painted on at a later time, then a lot of weathering. The armor has a chipped and discolored appearance, showing the silver underneath.
-

- Character image of Cara Dune
-
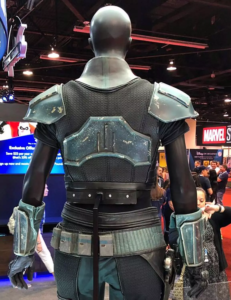
- Cara Dune’s armor (back)
-
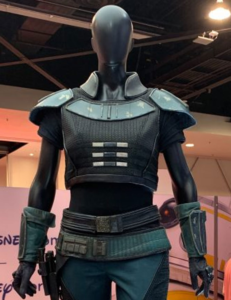
- Cara Dune’s armor (front)
To recreate this look, I first sprayed everything that has a silver base with multiple layers of silver:
-
- Armor spray painted with silver base layers
After giving that ample time to dry, I painted liquid latex on each silver area that I could determine in the reference images. This takes a little artistic flair to recreate the shapes of the chips.
-
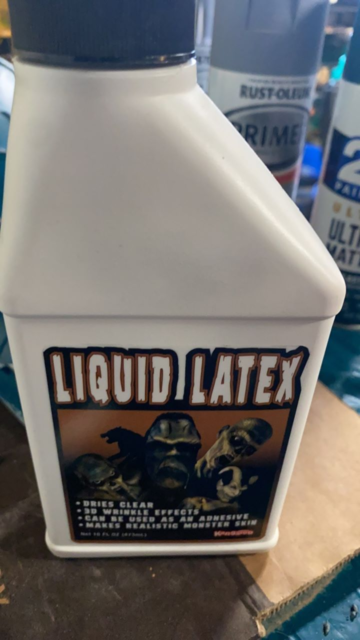
- Liquid latex
Painting the latex on will take a little artistic flair and lots of looking at reference images to recreate the shapes of the chips.
-

- Chest Armor (Top) and Back Armor (Bottom)
-
- Chest armor with liquid latex applied
After the latex was dry, I sprayed several layers of the teal over the top of the latex and the silver. You can see the latex in the bubbly appearing areas.
-

- Armor with latex after being painted teal
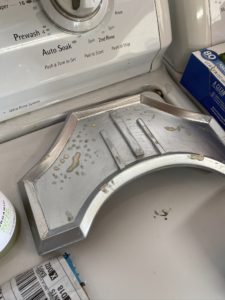
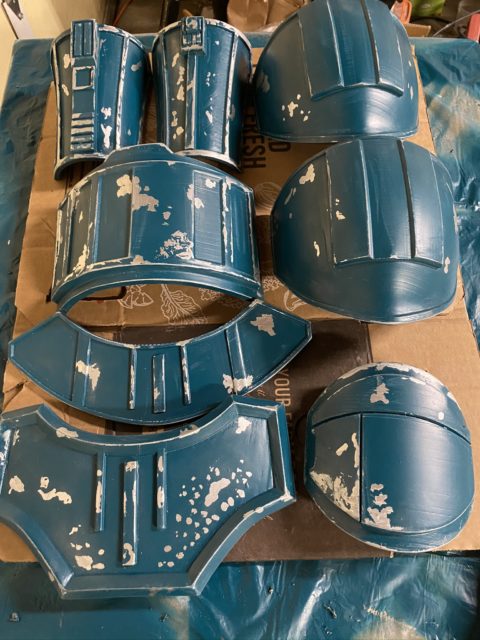
When the teal was dry to the touch, I rubbed off all the areas where I had applied latex carefully with a cloth.
-
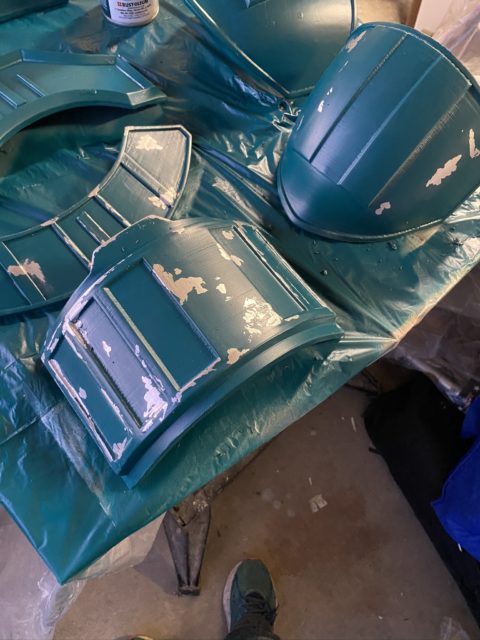
- Armor after latex has been removed
I then sanded the edges and anywhere that seemed like armor would have wear from contact with other surfaces.
-

- Painted armor after latex removal and sanding
I will be going in and creating more weathering effects with watered down acrylic paint, then finishing it off with a satin varnish to keep it protected, but this is the basic information on how to create this chipped paint look on a 3D print!
-
- Painted and sanded armor